
Your shopping cart is empty!
What Goes Into Making an Ancient Territories Flute
James Krenov once said that fine things in wood matter not only as rarities, but because so much of life becomes buying, discarding, and buying again. Some of us long to have at least something that brings harmony and a sense of durability, things that become more beautiful through the years, things we leave to our children.
That spirit is close to the work of making a Native American style flute.
We want you to understand what goes into making an Ancient Territories Native American style flute. This helps you better appreciate the instrument and understand what your money is paying for.
These steps are taken with every flute we make. For the higher priced models like the Craftsman Flute and the Collectors Flute many additional procedures are necessary.
It would be possible to simplify this process and produce a less expensive flute. But then we would not feel comfortable putting our name on it. In our mind, that would be a second rate instrument.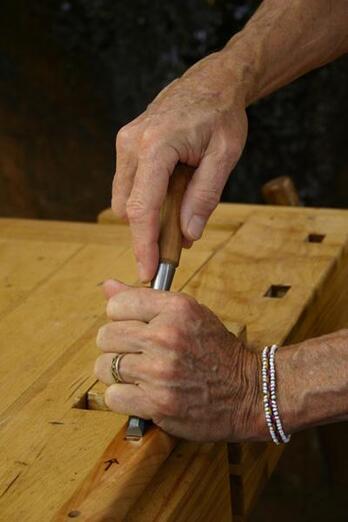
If you wish, you can also use these notes as a guide to making a Love flute of your own. But you would need a shop equipped with similar tools. We do not recommend that someone with little or no woodworking experience attempt flute making without proper instruction because it usually takes many failed attempts before a flute begins to come out well. If you have the bug, good luck. There are some good flute making manuals and DVDs available. Use those as your primary guide and these notes as a supplement.
Let the flute making begin.
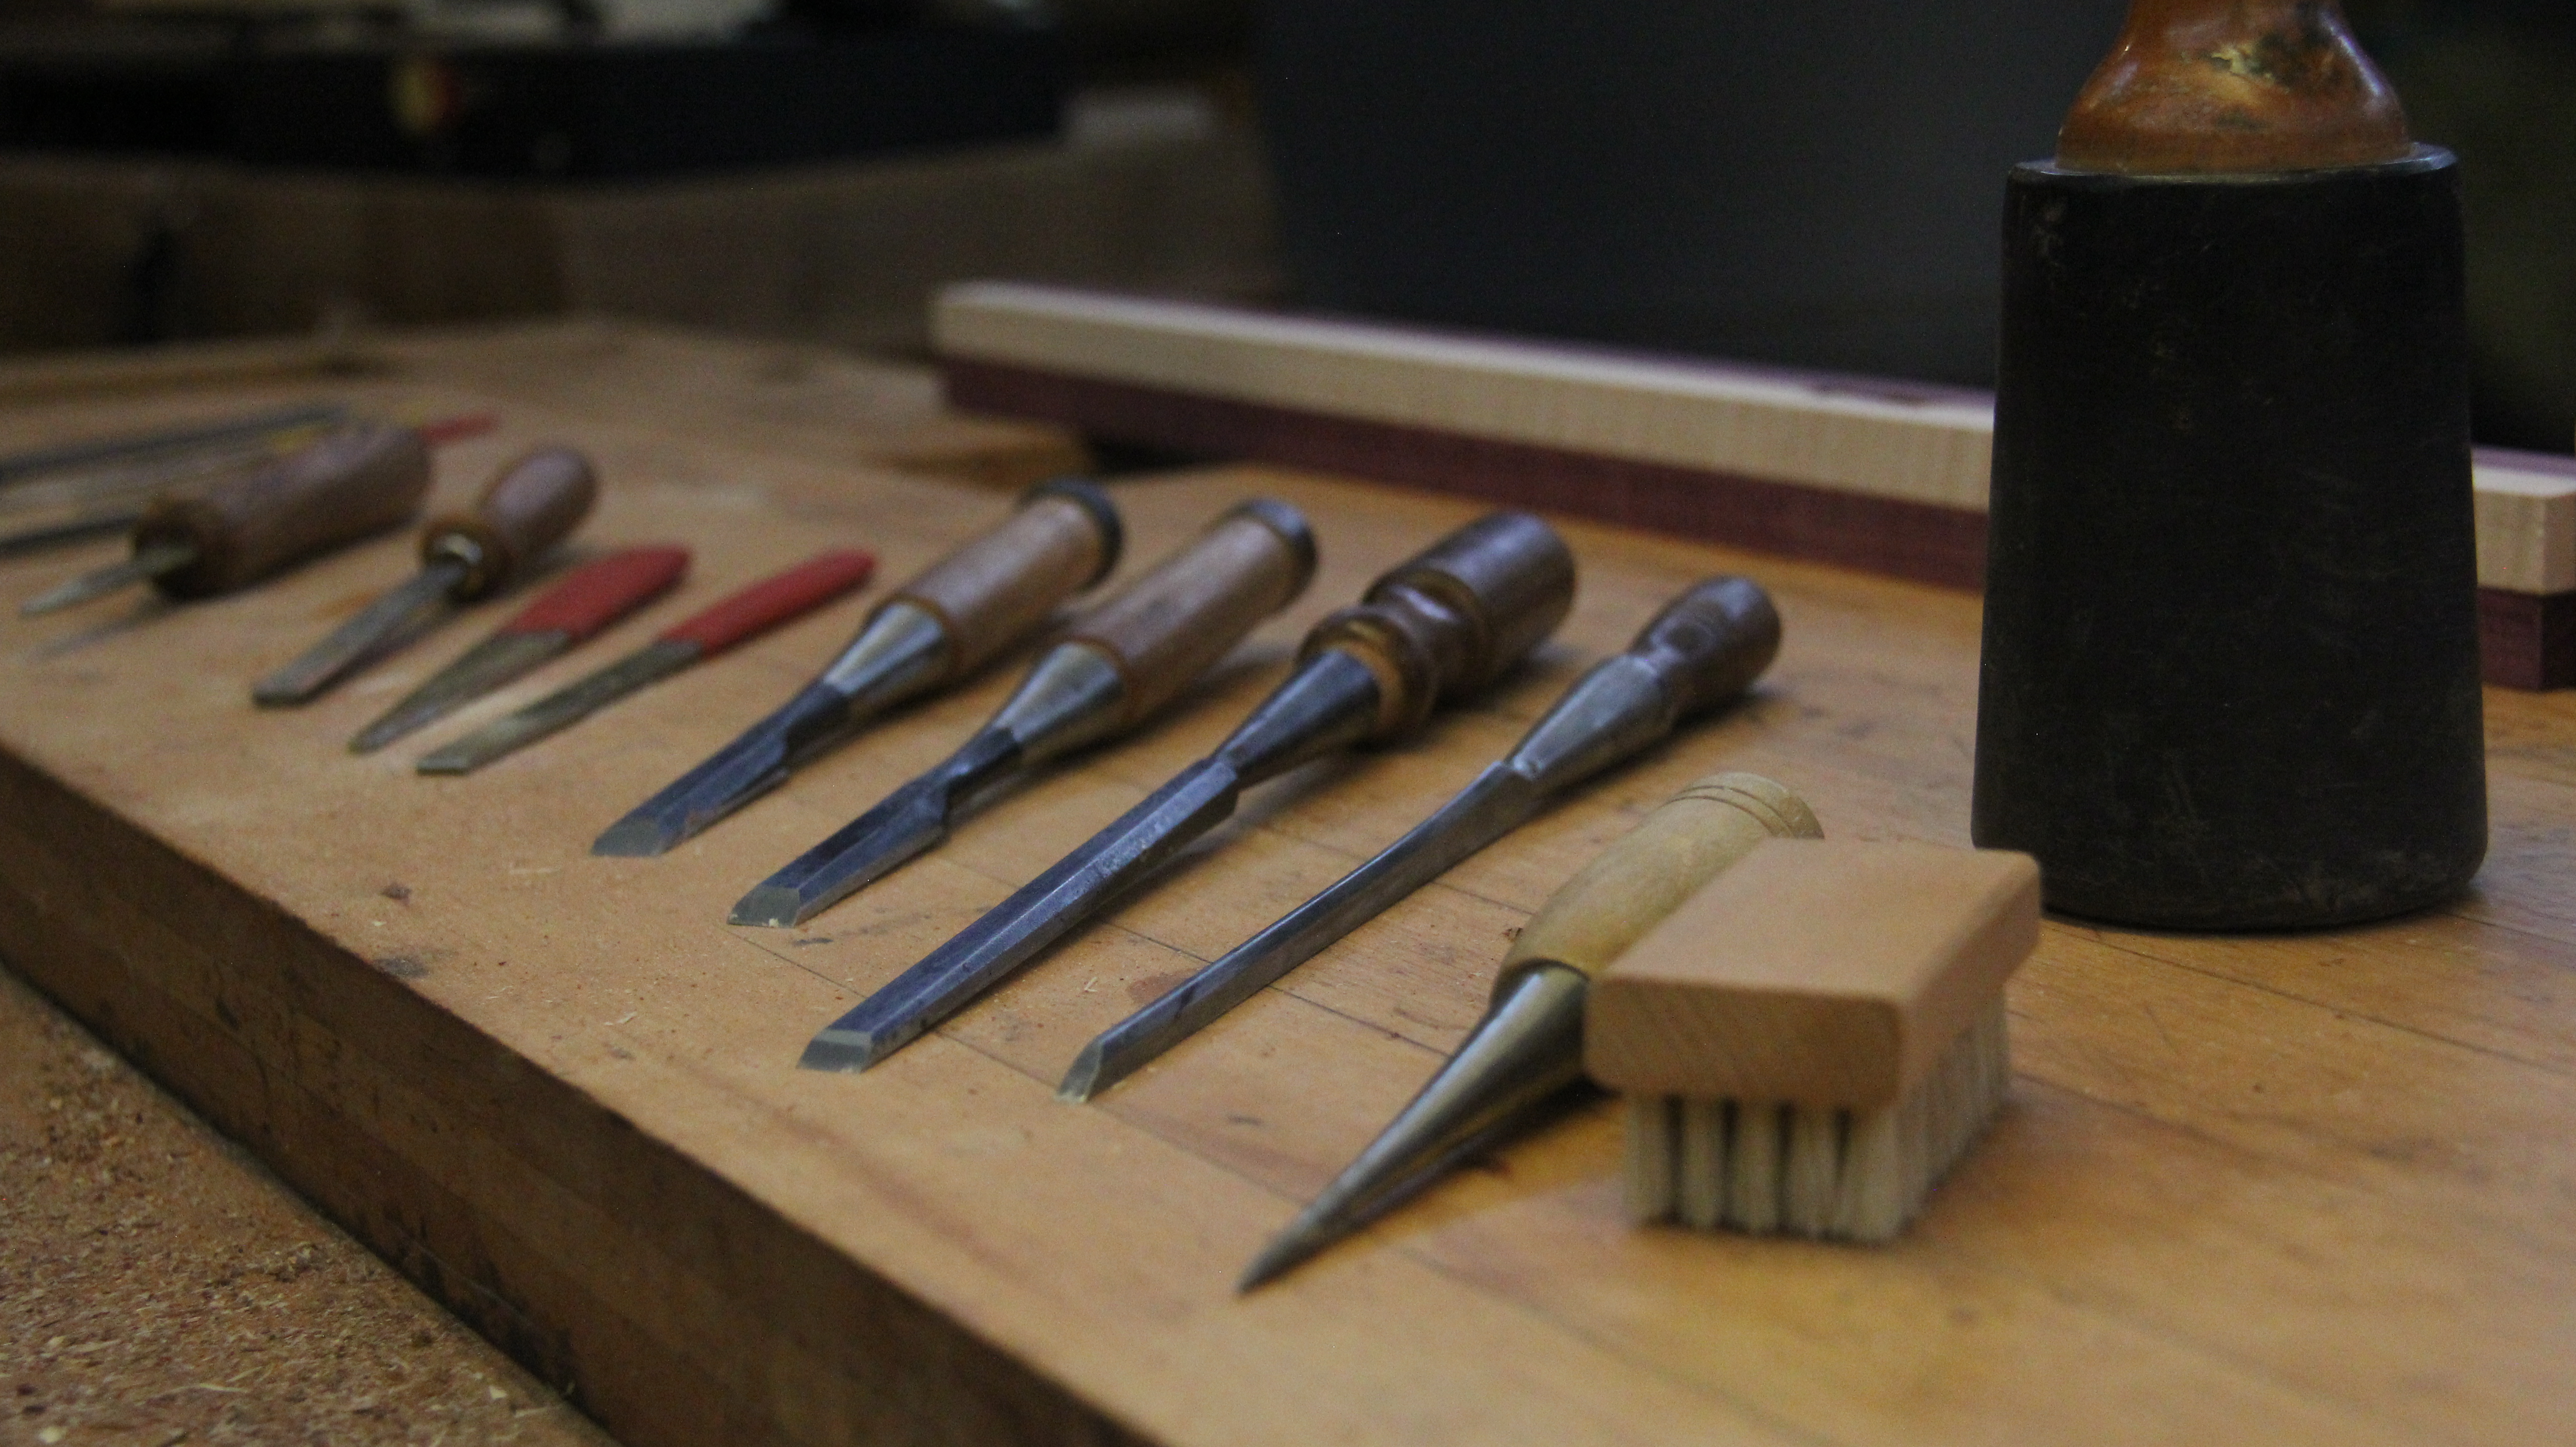
 Step One Selecting and Preparing the Wood
Knowledgeable wood selection is the basis of making a Native American style flute.
We have worked with exotic hardwoods for more than thirty years and have studied under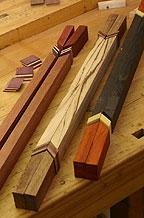 several master craftsmen. This training helped us develop an eye for quality in wood.
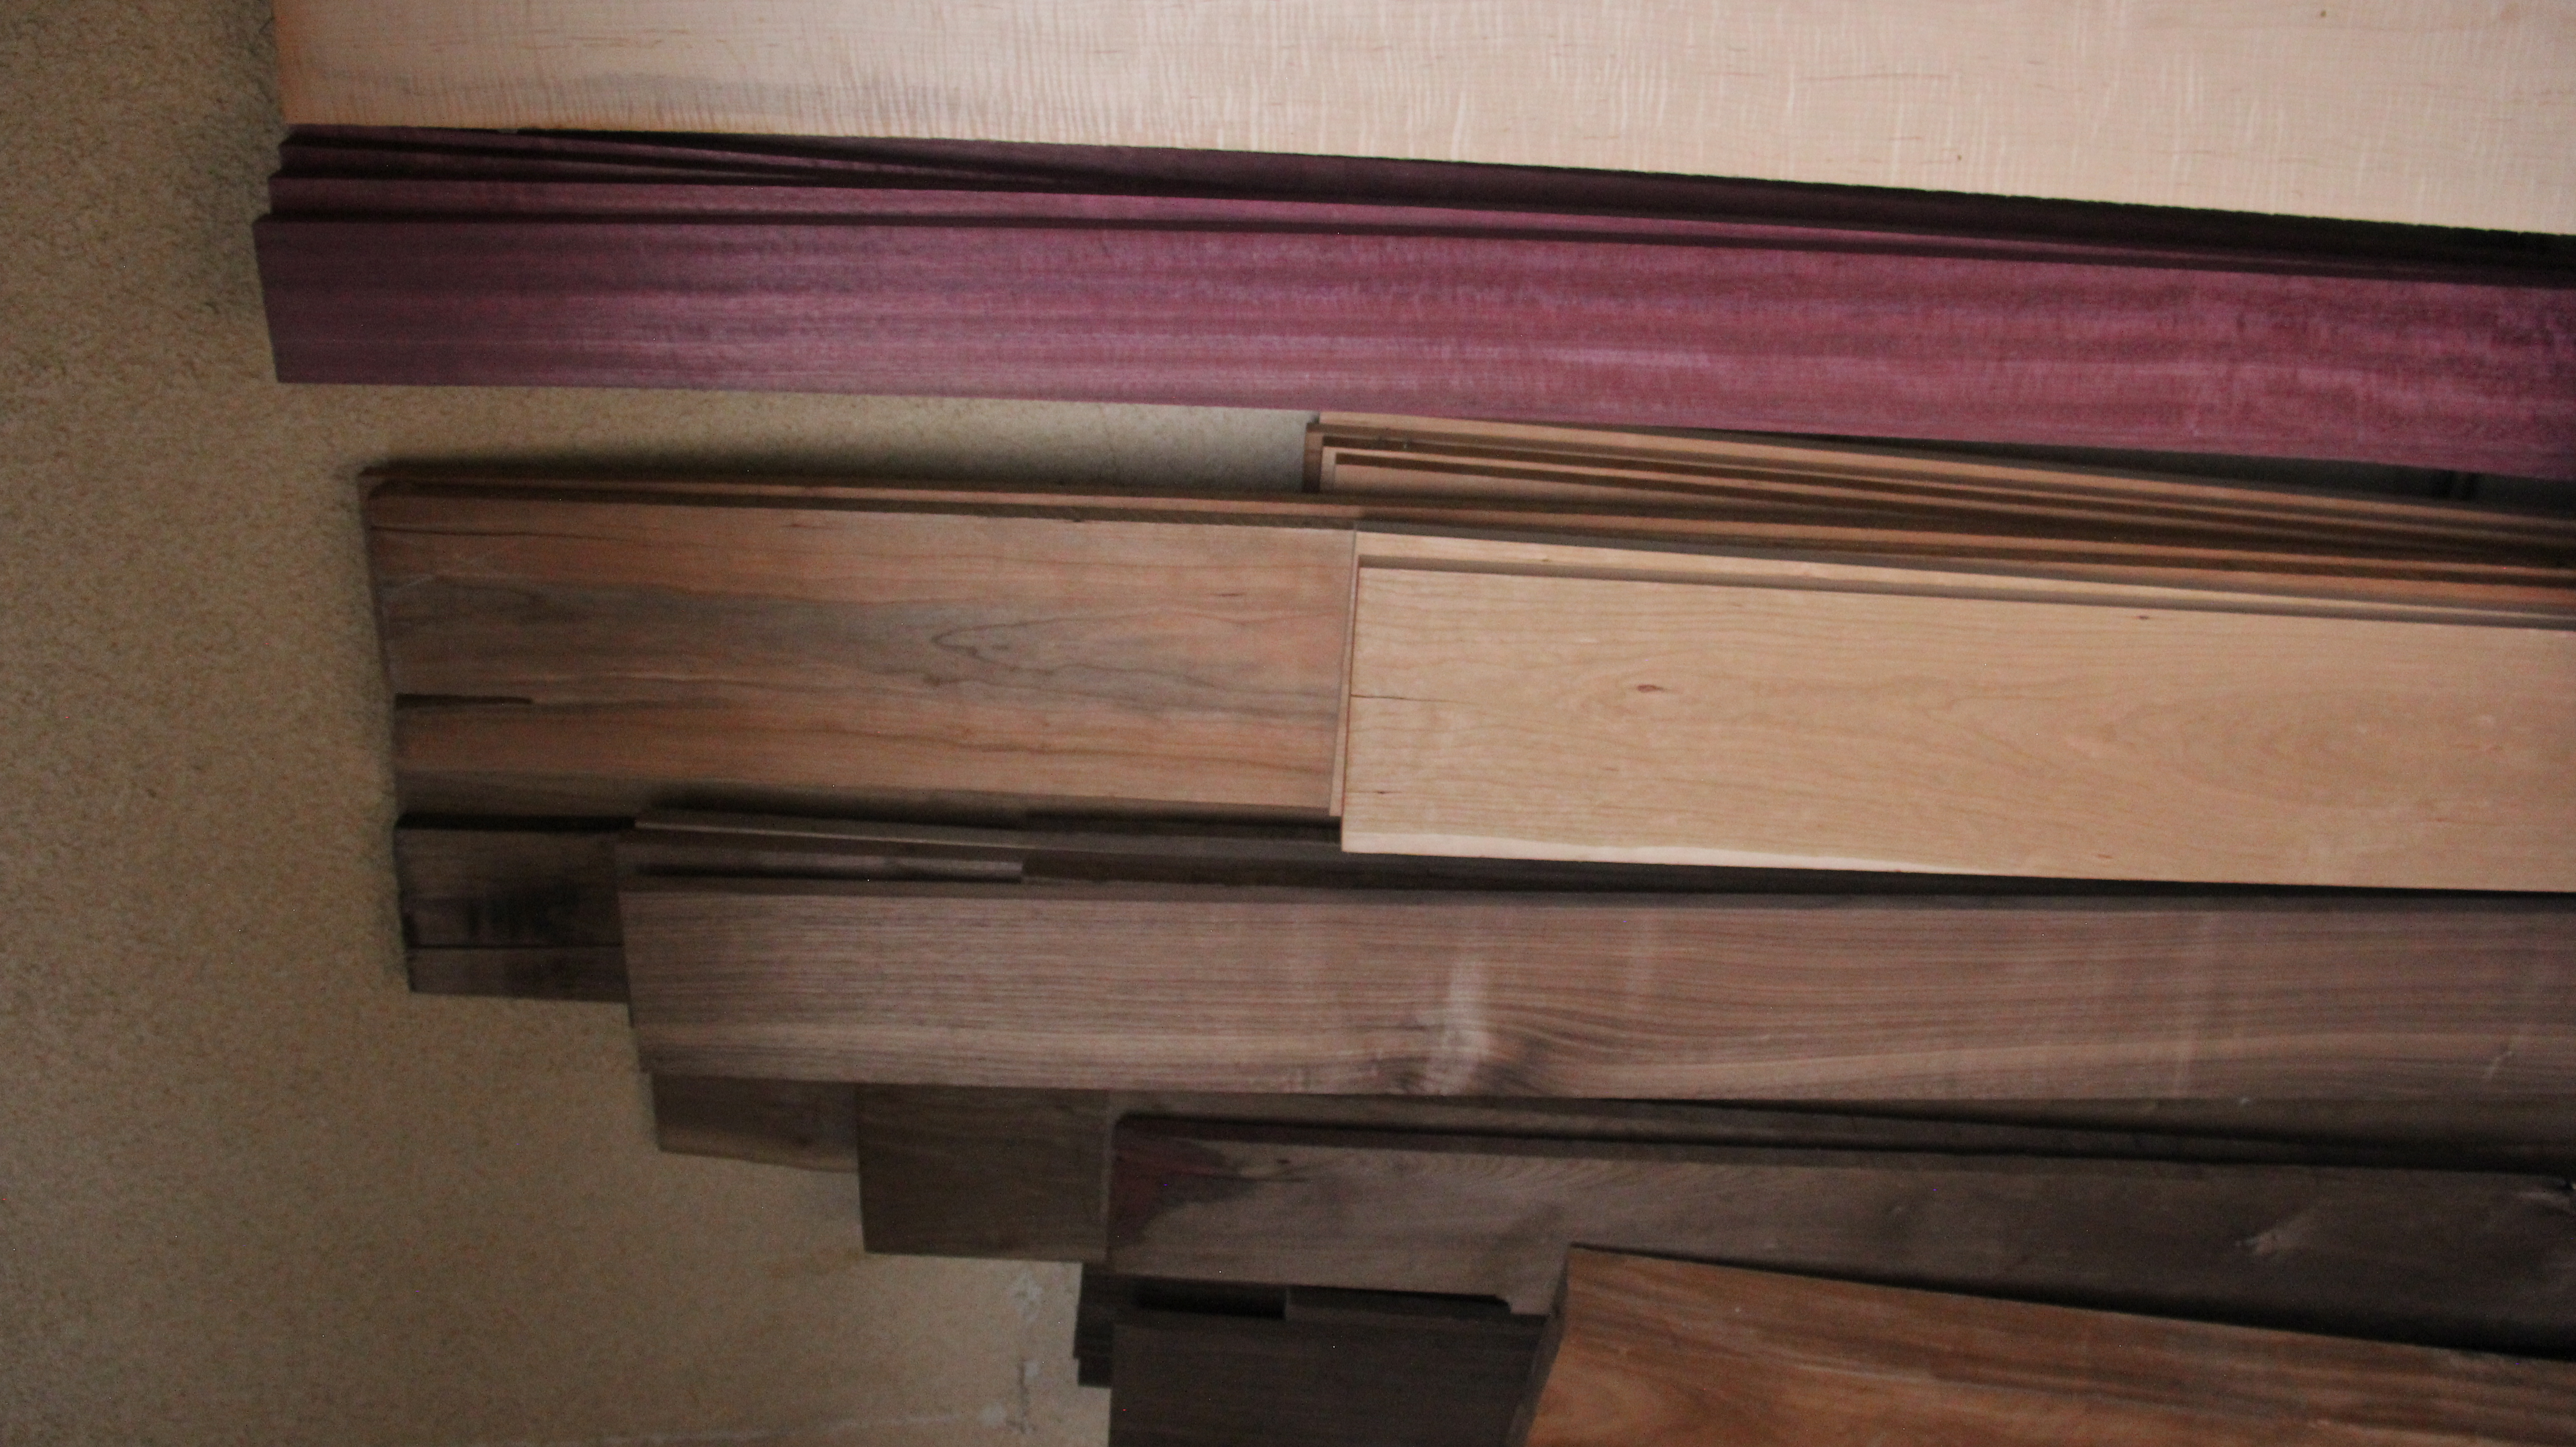
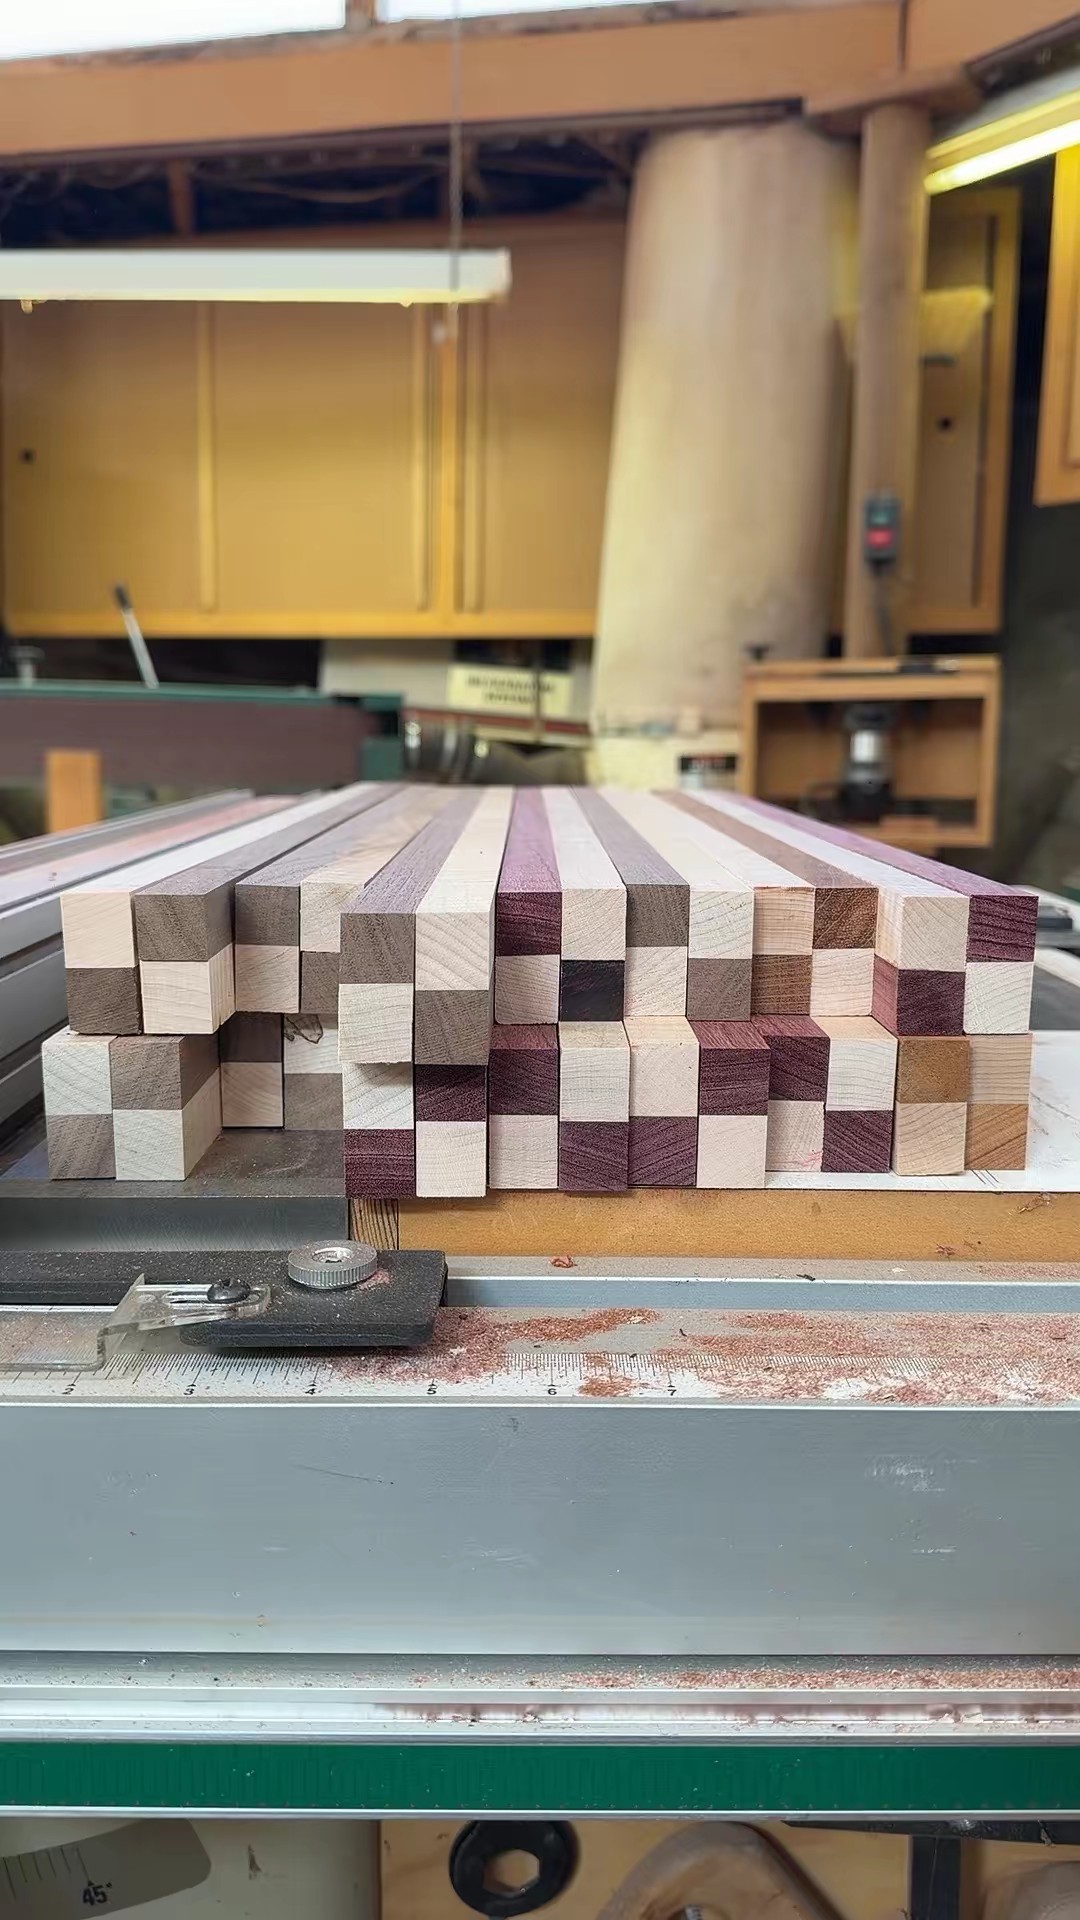
Because we live within driving distance of large wood dealers, we can sort through hundreds of boards by hand. We look for pieces with special pattern, color, and density. This work is slow, heavy, and time consuming. In a single visit we may handle several thousand pounds of wood.
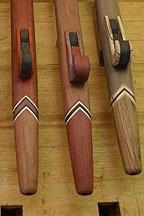
All the colors found in our flutes are natural. We do not use stains or dyes.
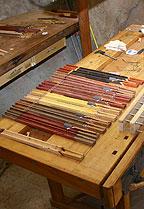
Milling and Matching the Halves
-
We crosscut boards into flute length blanks, such as 21, 22, or 23 inches, depending on the key. Flaws such as knots, cracks, and blemishes are removed.
-
One edge is trued on the jointer.
-
The blanks are rip cut to rough width based on bore diameter. Two adjacent slices become the left and right halves. These can be book matched so the grain forms a near mirror image on the top of the flute when glued.
-
The book matched halves are labeled so they remain paired.
-
The bore side of each half is flattened on the jointer so the glue joint closes accurately.
For how key relates to length and bore, see our Native American Style Flute Facts and Dimensions article.
Step Two Cutting the Bore and Slow Air Chamber
-
The bore and Slow Air Chamber are hollowed on the table saw using a molder head. This requires two or more passes to create the half round cut. The large groove does not go entirely through to the mouth end because the flute is built in two halves and later glued into a single tube.
-
The mouth hole is cut with a 3/8 inch cove bit on the router table.
-
The jointed surfaces are lightly sanded to give the glue proper bite.
Step Three Making and Sealing the Ramp Plug
-
Plugs separating the bore from the Slow Air Chamber are cut from birch or rock maple dowels. The bore end is cut square. The Slow Air Chamber end is cut at a 52 degree angle to form the ramp that guides air up and out of the SAC.
-
Plugs are sanded and soaked in polyurethane so they resist moisture absorption and swelling, which could lead to cracking.
For why the Slow Air Chamber matters, see our Importance of the Slow Air Chamber article.
Step Four Cutting the Sound Generating Mechanism
-
The SAC exit hole and the True Sound Hole are cut, with half of each hole formed in each half of the flute.
-
The bore and Slow Air Chamber interior are hand sanded before sealing.
-
The inside surfaces are sealed with polyurethane, then sanded again to remove raised grain and leave a smooth interior.
Step Five Gluing the Flute Together
-
Glue is applied to both halves and the plug, spread into an even film, and the plug is positioned. The halves are
 aligned so the SAC exit and True Sound Hole match, then the flute is pressed evenly along its length.
 -
Squeezed out glue is cleaned from the bore and SAC before drying.
-
After curing, excess glue is scraped from the outside.
-
The top and bottom surfaces are flattened on the belt sander.
-
The top and bottom are run across the jointer to flatten and square.
Step Six Cutting the Flue and Voicing the First Sound
-
The flue is cut into the body of the flute between the Slow Air Chamber and the bore using a handheld router and jig.
-
Any misalignment between the two halves is corrected with hand files and chisels around the SAC exit and True Sound Hole. This work is exacting because errors affect the sound generating mechanism.
At this point a bird can be placed on the nest and the flute can speak for the first time.
If shape and color were all that mattered, flutes could be wall hangers. But the most important thing is sound quality. Our sound generating design places the air focusing channel in the flute body rather than in the bird. This approach is sometimes called the Eastern woodlands style and it allows more consistent focusing of the air stream, a cleaner sound, and greater volume without breaking octave.
Shaping the Flute Body
At this stage the flute is still a long square block with a hollow center and strange openings on top. Now it must be shaped into the distinctive Ancient Territories form.
Our flutes are not round like most Native American style flutes. Round flutes are usually turned on a lathe. Lathe turning is fast, but we prefer a form that feels like a sculpted object rather than a cylinder.
Ancient Territories flutes have a soft triangular cross section, subtle angles, and asymmetrical curves. The shape is designed to please the eye and also feel comfortable in the hands and against the lips.
Rough Shaping and Refinement
-
The mouth end is trimmed to final length with a square cut.
-
Excess wood at the mouth end is removed with angled table saw cuts.
-
The lower sides are rough milled using a custom router bit, beginning the triangular form.The top surface is curved with a special router bit.
-
Remaining angular surfaces around the mouth end are softened with a 3/8 inch round over bit.
-
Hand shaping begins on a belt sander with coarse grit to refine angles and curves.
-
Sanding progresses to finer grit to smooth the form.
-
A Dremel is used to clean the inside edge of the mouth hole.
-
A flap sander softens remaining sharp edges.
-
Finer grit is used to refine surface quality further.
The head end is shaped so the flute can be held against the lips rather than placed in the mouth. The top surface is slightly flattened for comfortable finger placement.
Tuning and Tone Hole Work
-
The barrel end is trimmed to tune the fundamental note. The longer the barrel, the lower the key. This is done in small steps, testing on an electronic tuner and making fine adjustments as needed.
-
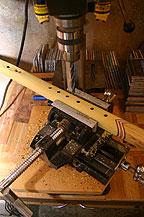
Tone holes are drilled on a drill press with a laser sight using a machinist vise for precise alignment and spacing.
-
The inside of the bore is sanded to remove hanging fibers left by drilling.
-
The outside edges of tone holes are rounded for comfort.
-
The inside edges of tone holes are rounded, then each note is tuned by shaving small amounts of wood from the bottom of holes to bring notes into balance.
-
The inside edge of the flute foot is softened.
-
The outside of the flute foot is shaped and rounded for appearance and comfort.
-
The end is further refined with sanding.
-
Exterior surfaces are smoothed again, taking care not to touch the True Sound Hole edges.
For a technical overview of how these dimensions interact with tone, see our Factors Affecting Tonal Quality article.
Making the Sound Wave Bird
-
The flute body is ready for finishing, but the birds must be made.
-
Bird stock is ripped to dimension.
-
Pieces are resawn into thin slices on the band saw.
-
Surfaces are smoothed on a thickness sander.
-
Three strips are glued into a laminated bird blank and clamped.
-
Excess glue is removed and the blank is squared.
-
The blank is trimmed to final height.
-
The blank is crosscut into smaller pieces.
-
A hole is drilled to form the internal wave curve.
-
The chimney is routed. When the bird sits on the flute, the chimney surrounds the True Sound Hole on three sides. This helps focus the air stream and protect it from cross currents.
-
Band saw cuts form the wave opening.
-
Waste is removed and trim cuts rough the outline.
-
The bird form is rounded and refined on the belt sander.
-
The inside curve is smoothed on an oscillating spindle sander.
-
Edges are softened with a cove bit.
-
The mating surface is flattened and smoothed.
-
The top surfaces are softened and rounded.
Finishing and Sealing
We finish both flute and bird with polyurethane varnish. When dry, polyurethane is non toxic.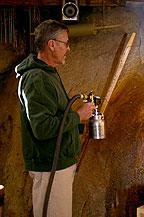
We use polyurethane because it offers durability and flexibility. Unlike harder finishes such as some epoxy and lacquer surfaces, it resists chipping and cracking. It is waterproof and resistant to alcohol and saliva.
Polyurethane is also resistant to moisture transfer. This matters because moisture absorption can lead to expansion and contraction and possible cracking. It also filters ultraviolet light, helping preserve natural wood color.
We have experimented with natural finishes such as tung oil and other oils. They do not hold up as well in daily use. In addition, Slow Air Chambers finished only with natural oils can absorb moisture, grow mold, and develop an unpleasant odor.
Exterior Finish
-
The raw flute is cleaned of dust and a light coat is sprayed with an HVLP sprayer, then allowed to dry for 24 hours.
-
The surface is lightly sanded with fine paper to smooth raised grain and provide tooth for the next coat.
-
Areas not reachable by machine are hand sanded.
Slow Air Chamber Sealing
-
Two stage epoxy is applied to the interior surfaces of the Slow Air Chamber by pouring through the SAC exit hole and rotating the flute to coat all surfaces. Excess epoxy drains out with the flute suspended mouth end down. This ensures complete sealing even along glue joints.
Final Refinement and Second Tuning
-
Interior surfaces of the SAC exit and True Sound Hole are further refined.
-
A second coat of polyurethane is sprayed on the exterior. The bird is finished in the same manner.
-
Because finish can slightly change critical dimensions, the flute is tuned again.
-
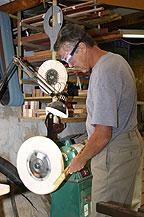
The finish is hand sanded and polished to a satin like feel.
-
A leather thong is cut to secure the bird, and the flute is assembled.
For more about finishes and why we use them, see our What Is a Finish article.
Reference Measurements for Makers
For those planning to make a flute:
-
True Sound Hole width — 0.44 inches
-
True Sound Hole depth front to back — 0.23 inches
-
Flue depth — 0.035 inches
These measurements are offered as reference only. Small variations affect tone, and the full system must be balanced.
Sound Quality Comes First
If you have followed these steps, you can see the attention to detail that goes into our Native American style flutes. We strive to make a musical instrument that will be played, not just admired.
A well made flute becomes a companion for years.
Frequently Asked Questions About How Our Flutes Are Made
Why use book matched wood halves
Cutting adjacent slices allows the grain to mirror across the top of the flute, creating natural symmetry without stains or dyes.
Why seal the Slow Air Chamber with epoxy
The SAC is exposed to moisture from breath. Sealing helps prevent moisture absorption that can lead to swelling, cracking, mold, or odor.
Why cut the flue into the body instead of the bird
A body cut flue allows more consistent focusing of the air stream against the splitting edge, supporting clarity and stable volume.
Does finish affect tuning
Yes. Finish can slightly change critical dimensions and airflow behavior, so tuning is checked again after finishing.